相信很多人都听过 OwnCloud.Nextcloud 就是 OwnCloud 主创人员出走创立的新品牌 . 所以无论在使用还是界面体验上和 owncloud 非常像 .
国内网盘隐私问题堪忧 , 唯存的大容量百度盘又各种作死 . 而 Google Drive 又要梯子才能用 . 自己架设个私有云盘自娱自乐也蛮好的 .
NextCloud 社区有非常多人开发了很多应用 , 现在就有 RSS 阅读器 ,Markdown 编辑器 , 通讯录 , 脑图 , 日程安排等应用 , 如果有些额外的需求 , 它又不仅仅是一个私有云盘 . 唯一可惜的就是这些应用只支持 web 形式使用 .app 上目前还不支持 .
NextCloud 官网
一键安装包官网 :nextcloud snap : https://github.com/nextcloud/nextcloud-snap
NextCloud 一键安装方法
建议安装 Ubuntu 系统 , 因为官方一键包用的是 snap,centos 还未支持 . 所以 Ubuntu 是目前最简单的安装系统 .
建议可用D9,64X,
|
1
2
3
4
|
sudo apt-get update
sudo apt-get install snap
sudo apt-get install snapd
sudo snap install nextcloud
|
OK, 搞定 . 简单吧 .
这时你可以使用服务器 IP 访问 , 如果你想用域名访问 , 只要把域名指到这个 IP 就可以 , 用域名访问的时候 ,nextcloud 就会询问你是否绑定这个域名 .
第一次访问 , 会提示你设置下管理员的帐号和密码
启用 SSL, 使用 https 访问(本人没有成功)
|
1
|
sudo nextcloud.enable-https lets-encrypt
|
系统就会自动申请 lets-encrypt 证书并启用 . 也很简单吧 .
启用HTTPS站点
刚刚只是安装好了NextCloud服务端,现在要进行域名的设置。
首先要提前将要绑定的域名解析到你服务器的ip地址,最好等到确定解析成功了再进行接下来的步骤。
输入以下代码执行申请Let’s Encrypt的证书:
sudo nextcloud.enable-https lets-encryptsudo nextcloud.enable-https lets-encryptsudo nextcloud.enable-https lets-encrypt

(在这一步的时候我出现了问题,在部署完证书之后我无法访问我的域名和ip地址,这个问题在我卸载重装之后等到了解决。P.S.卸载命令:snap remove nextcloud 重装后需重新执行申请证书命令)
此时通过域名访问会出现来自不受信任的域,如下图所示:

这时候只需要输入下面的命令即可(将domain.com换成自己的域名,如需再加就将1改为2,以此类推)
sudo nextcloud.occ config:system:set trusted_domains 1 --value=domain.comsudo nextcloud.occ config:system:set trusted_domains 1 --value=domain.comsudo nextcloud.occ config:system:set trusted_domains 1 --value=domain.com
这样就可以正常访问了,到这个时候,你的nextcloud已经可以正常使用了。
以后升级的话
|
1
|
sudo snap refresh nextcloud
|
关于数据备份
数据库的文件夹 :/var/snap/nextcloud/current/
数据库文件夹包含了 :
- Apache, PHP, MySQL, and Redis logs
- Keys and certificates
- MySQL database
- Redis database
- Nextcloud config
- Any Nextcloud apps installed by the user
文件保存的文件夹 :/var/snap/nextcloud/common/
文件夹包含了 :
- Nextcloud data
- Nextcloud logs
把数据库和文件的文件夹都备份就可以拉
说明
本教程只适用Debian/Ubuntu系统,如果你是CentOS或者其它Linux系统,请使用以下命令安装rclone:
curl https://rclone.org/install.sh | sudo bashcurl https://rclone.org/install.sh | sudo bashcurl https://rclone.org/install.sh | sudo bash
初始化配置和挂载方法和下面一样,开机自启可参考该教程→传送门。
安装
1、安装rclone
wget https://www.moerats.com/usr/shell/rclone_debian.sh && bash rclone_debian.shwget https://www.moerats.com/usr/shell/rclone_debian.sh && bash rclone_debian.shwget https://www.moerats.com/usr/shell/rclone_debian.sh && bash rclone_debian.sh
2、初始化配置
rclone configrclone configrclone config
会出现以下信息:
n) New remotes) Set configuration passwordq) Quit confign/s/q> nname> Rats #配置名称,随便填Type of storage to configure.Enter a string value. Press Enter for the default ("").Choose a number from below, or type in your own value1 / 1Fichier\ "fichier"2 / Alias for an existing remote\ "alias"3 / Amazon Drive\ "amazon cloud drive"4 / Amazon S3 Compliant Storage Provider (AWS, Alibaba, Ceph, Digital Ocean, Dreamhost, IBM COS, Minio, etc)\ "s3"5 / Backblaze B2\ "b2"6 / Box\ "box"7 / Cache a remote\ "cache"8 / Dropbox\ "dropbox"9 / Encrypt/Decrypt a remote\ "crypt"10 / FTP Connection\ "ftp"11 / Google Cloud Storage (this is not Google Drive)\ "google cloud storage"12 / Google Drive\ "drive"13 / Google Photos\ "google photos"14 / Hubic\ "hubic"15 / JottaCloud\ "jottacloud"16 / Koofr\ "koofr"17 / Local Disk\ "local"18 / Mega\ "mega"19 / Microsoft Azure Blob Storage\ "azureblob"20 / Microsoft OneDrive\ "onedrive"21 / OpenDrive\ "opendrive"22 / Openstack Swift (Rackspace Cloud Files, Memset Memstore, OVH)\ "swift"23 / Pcloud\ "pcloud"24 / Put.io\ "putio"25 / QingCloud Object Storage\ "qingstor"26 / SSH/SFTP Connection\ "sftp"27 / Union merges the contents of several remotes\ "union"28 / Webdav\ "webdav"29 / Yandex Disk\ "yandex"30 / http Connection\ "http"31 / premiumize.me\ "premiumizeme"Storage> 12 #选择12,Google Drive 看实际情况Google Application Client Id - leave blank normally.client_id> #留空Google Application Client Secret - leave blank normally.client_secret> #留空Service Account Credentials JSON file path - needed only if you want use SA instead of interactive login.service_account_file> #留空Choose a number from below, or type in your own value1 / Full access all files, excluding Application Data Folder.\ "drive"2 / Read-only access to file metadata and file contents.\ "drive.readonly"/ Access to files created by rclone only.3 | These are visible in the drive website.| File authorization is revoked when the user deauthorizes the app.\ "drive.file"/ Allows read and write access to the Application Data folder.4 | This is not visible in the drive website.\ "drive.appfolder"/ Allows read-only access to file metadata but5 | does not allow any access to read or download file content.\ "drive.metadata.readonly"scope> 1ID of the root folderLeave blank normally.Fill in to access "Computers" folders. (see docs).Enter a string value. Press Enter for the default ("").root_folder_id>Service Account Credentials JSON file pathLeave blank normally.Needed only if you want use SA instead of interactive login.Enter a string value. Press Enter for the default ("").service_account_file>Edit advanced config? (y/n)y) Yesn) Noy/n> n #输入nRemote configUse auto config?* Say Y if not sure* Say N if you are working on a remote or headless machiney) Yesn) Noy/n> n #输入nIf your browser doesn't open automatically go to the following link: https://accounts.google.com/o/ #打开该地址获取codeLog in and authorize rclone for accessEnter verification code>hjdd #输入你获取到的codeConfigure this as a team drive?y) Yesn) Noy/n> n #输入n--------------------[Rats]type = driveclient_id = 85042871client_secret = D72gPcscope = drivetoken = {"access_token":"y902Z"}--------------------y) Yes this is OKe) Edit this remoted) Delete this remotey/e/d> y #输入yCurrent remotes:Name Type==== ====Rats drivee) Edit existing remoten) New remoted) Delete remoter) Rename remotec) Copy remotes) Set configuration passwordq) Quit confige/n/d/r/c/s/q> q #输入q保存退出n) New remote s) Set configuration password q) Quit config n/s/q> n name> Rats #配置名称,随便填 Type of storage to configure. Enter a string value. Press Enter for the default (""). Choose a number from below, or type in your own value 1 / 1Fichier \ "fichier" 2 / Alias for an existing remote \ "alias" 3 / Amazon Drive \ "amazon cloud drive" 4 / Amazon S3 Compliant Storage Provider (AWS, Alibaba, Ceph, Digital Ocean, Dreamhost, IBM COS, Minio, etc) \ "s3" 5 / Backblaze B2 \ "b2" 6 / Box \ "box" 7 / Cache a remote \ "cache" 8 / Dropbox \ "dropbox" 9 / Encrypt/Decrypt a remote \ "crypt" 10 / FTP Connection \ "ftp" 11 / Google Cloud Storage (this is not Google Drive) \ "google cloud storage" 12 / Google Drive \ "drive" 13 / Google Photos \ "google photos" 14 / Hubic \ "hubic" 15 / JottaCloud \ "jottacloud" 16 / Koofr \ "koofr" 17 / Local Disk \ "local" 18 / Mega \ "mega" 19 / Microsoft Azure Blob Storage \ "azureblob" 20 / Microsoft OneDrive \ "onedrive" 21 / OpenDrive \ "opendrive" 22 / Openstack Swift (Rackspace Cloud Files, Memset Memstore, OVH) \ "swift" 23 / Pcloud \ "pcloud" 24 / Put.io \ "putio" 25 / QingCloud Object Storage \ "qingstor" 26 / SSH/SFTP Connection \ "sftp" 27 / Union merges the contents of several remotes \ "union" 28 / Webdav \ "webdav" 29 / Yandex Disk \ "yandex" 30 / http Connection \ "http" 31 / premiumize.me \ "premiumizeme" Storage> 12 #选择12,Google Drive 看实际情况 Google Application Client Id - leave blank normally. client_id> #留空 Google Application Client Secret - leave blank normally. client_secret> #留空 Service Account Credentials JSON file path - needed only if you want use SA instead of interactive login. service_account_file> #留空 Choose a number from below, or type in your own value 1 / Full access all files, excluding Application Data Folder. \ "drive" 2 / Read-only access to file metadata and file contents. \ "drive.readonly" / Access to files created by rclone only. 3 | These are visible in the drive website. | File authorization is revoked when the user deauthorizes the app. \ "drive.file" / Allows read and write access to the Application Data folder. 4 | This is not visible in the drive website. \ "drive.appfolder" / Allows read-only access to file metadata but 5 | does not allow any access to read or download file content. \ "drive.metadata.readonly" scope> 1 ID of the root folder Leave blank normally. Fill in to access "Computers" folders. (see docs). Enter a string value. Press Enter for the default (""). root_folder_id> Service Account Credentials JSON file path Leave blank normally. Needed only if you want use SA instead of interactive login. Enter a string value. Press Enter for the default (""). service_account_file> Edit advanced config? (y/n) y) Yes n) No y/n> n #输入n Remote config Use auto config? * Say Y if not sure * Say N if you are working on a remote or headless machine y) Yes n) No y/n> n #输入n If your browser doesn't open automatically go to the following link: https://accounts.google.com/o/ #打开该地址获取code Log in and authorize rclone for access Enter verification code>hjdd #输入你获取到的code Configure this as a team drive? y) Yes n) No y/n> n #输入n -------------------- [Rats] type = drive client_id = 85042871 client_secret = D72gPc scope = drive token = {"access_token":"y902Z"} -------------------- y) Yes this is OK e) Edit this remote d) Delete this remote y/e/d> y #输入y Current remotes: Name Type ==== ==== Rats drive e) Edit existing remote n) New remote d) Delete remote r) Rename remote c) Copy remote s) Set configuration password q) Quit config e/n/d/r/c/s/q> q #输入q保存退出n) New remote s) Set configuration password q) Quit config n/s/q> n name> Rats #配置名称,随便填 Type of storage to configure. Enter a string value. Press Enter for the default (""). Choose a number from below, or type in your own value 1 / 1Fichier \ "fichier" 2 / Alias for an existing remote \ "alias" 3 / Amazon Drive \ "amazon cloud drive" 4 / Amazon S3 Compliant Storage Provider (AWS, Alibaba, Ceph, Digital Ocean, Dreamhost, IBM COS, Minio, etc) \ "s3" 5 / Backblaze B2 \ "b2" 6 / Box \ "box" 7 / Cache a remote \ "cache" 8 / Dropbox \ "dropbox" 9 / Encrypt/Decrypt a remote \ "crypt" 10 / FTP Connection \ "ftp" 11 / Google Cloud Storage (this is not Google Drive) \ "google cloud storage" 12 / Google Drive \ "drive" 13 / Google Photos \ "google photos" 14 / Hubic \ "hubic" 15 / JottaCloud \ "jottacloud" 16 / Koofr \ "koofr" 17 / Local Disk \ "local" 18 / Mega \ "mega" 19 / Microsoft Azure Blob Storage \ "azureblob" 20 / Microsoft OneDrive \ "onedrive" 21 / OpenDrive \ "opendrive" 22 / Openstack Swift (Rackspace Cloud Files, Memset Memstore, OVH) \ "swift" 23 / Pcloud \ "pcloud" 24 / Put.io \ "putio" 25 / QingCloud Object Storage \ "qingstor" 26 / SSH/SFTP Connection \ "sftp" 27 / Union merges the contents of several remotes \ "union" 28 / Webdav \ "webdav" 29 / Yandex Disk \ "yandex" 30 / http Connection \ "http" 31 / premiumize.me \ "premiumizeme" Storage> 12 #选择12,Google Drive 看实际情况 Google Application Client Id - leave blank normally. client_id> #留空 Google Application Client Secret - leave blank normally. client_secret> #留空 Service Account Credentials JSON file path - needed only if you want use SA instead of interactive login. service_account_file> #留空 Choose a number from below, or type in your own value 1 / Full access all files, excluding Application Data Folder. \ "drive" 2 / Read-only access to file metadata and file contents. \ "drive.readonly" / Access to files created by rclone only. 3 | These are visible in the drive website. | File authorization is revoked when the user deauthorizes the app. \ "drive.file" / Allows read and write access to the Application Data folder. 4 | This is not visible in the drive website. \ "drive.appfolder" / Allows read-only access to file metadata but 5 | does not allow any access to read or download file content. \ "drive.metadata.readonly" scope> 1 ID of the root folder Leave blank normally. Fill in to access "Computers" folders. (see docs). Enter a string value. Press Enter for the default (""). root_folder_id> Service Account Credentials JSON file path Leave blank normally. Needed only if you want use SA instead of interactive login. Enter a string value. Press Enter for the default (""). service_account_file> Edit advanced config? (y/n) y) Yes n) No y/n> n #输入n Remote config Use auto config? * Say Y if not sure * Say N if you are working on a remote or headless machine y) Yes n) No y/n> n #输入n If your browser doesn't open automatically go to the following link: https://accounts.google.com/o/ #打开该地址获取code Log in and authorize rclone for access Enter verification code>hjdd #输入你获取到的code Configure this as a team drive? y) Yes n) No y/n> n #输入n -------------------- [Rats] type = drive client_id = 85042871 client_secret = D72gPc scope = drive token = {"access_token":"y902Z"} -------------------- y) Yes this is OK e) Edit this remote d) Delete this remote y/e/d> y #输入y Current remotes: Name Type ==== ==== Rats drive e) Edit existing remote n) New remote d) Delete remote r) Rename remote c) Copy remote s) Set configuration password q) Quit config e/n/d/r/c/s/q> q #输入q保存退出
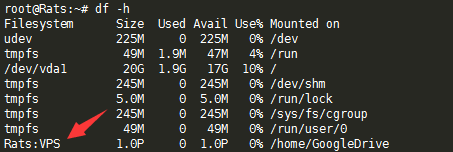
3、挂载为磁盘
#新建本地文件夹,路径自己定,即下面的LocalFoldermkdir /root/GoogleDrive#挂载为磁盘,下面的DriveName、Folder、LocalFolder参数根据说明自行替换rclone mount DriveName:Folder LocalFolder --copy-links --no-gzip-encoding --no-check-certificate --allow-other --allow-non-empty --umask 000#新建本地文件夹,路径自己定,即下面的LocalFolder
mkdir /root/GoogleDrive
#挂载为磁盘,下面的DriveName、Folder、LocalFolder参数根据说明自行替换
rclone mount DriveName:Folder LocalFolder --copy-links --no-gzip-encoding --no-check-certificate --allow-other --allow-non-empty --umask 000#新建本地文件夹,路径自己定,即下面的LocalFolder
mkdir /root/GoogleDrive
#挂载为磁盘,下面的DriveName、Folder、LocalFolder参数根据说明自行替换
rclone mount DriveName:Folder LocalFolder --copy-links --no-gzip-encoding --no-check-certificate --allow-other --allow-non-empty --umask 000
DriveName为初始化配置填的name,Folder为Google Drive里的文件夹,LocalFolder为VPS上的本地文件夹。
fusermount -qzu LocalFolderfusermount -qzu LocalFolderfusermount -qzu LocalFolder
开机自启
先新建systemd配置文件,适用CentOS 7、Debian 8+、Ubuntu 16+。
再使用命令:
#将后面修改成你上面手动运行命令中,除了rclone的全部参数command="mount DriveName:Folder LocalFolder --copy-links --no-gzip-encoding --no-check-certificate --allow-other --allow-non-empty --umask 000"#以下是一整条命令,一起复制到SSH客户端运行cat > /etc/systemd/system/rclone.service <<EOF[Unit]Description=RcloneAfter=network-online.target[Service]Type=simpleExecStart=$(command -v rclone) ${command}Restart=on-abortUser=root[Install]WantedBy=default.targetEOF#将后面修改成你上面手动运行命令中,除了rclone的全部参数
command="mount DriveName:Folder LocalFolder --copy-links --no-gzip-encoding --no-check-certificate --allow-other --allow-non-empty --umask 000"
#以下是一整条命令,一起复制到SSH客户端运行
cat > /etc/systemd/system/rclone.service <<EOF
[Unit]
Description=Rclone
After=network-online.target

[Service]
Type=simple
ExecStart=$(command -v rclone) ${command}
Restart=on-abort
User=root

[Install]
WantedBy=default.target
EOF#将后面修改成你上面手动运行命令中,除了rclone的全部参数
command="mount DriveName:Folder LocalFolder --copy-links --no-gzip-encoding --no-check-certificate --allow-other --allow-non-empty --umask 000"
#以下是一整条命令,一起复制到SSH客户端运行
cat > /etc/systemd/system/rclone.service <<EOF
[Unit]
Description=Rclone
After=network-online.target

[Service]
Type=simple
ExecStart=$(command -v rclone) ${command}
Restart=on-abort
User=root

[Install]
WantedBy=default.target
EOF
开始启动:
systemctl start rclonesystemctl start rclonesystemctl start rclone
设置开机自启:
systemctl enable rclonesystemctl enable rclonesystemctl enable rclone
其他命令:
重启:systemctl restart rclone停止:systemctl stop rclone状态:systemctl status rclone重启:systemctl restart rclone
停止:systemctl stop rclone
状态:systemctl status rclone重启:systemctl restart rclone
停止:systemctl stop rclone
状态:systemctl status rclone
如果你想挂载多个网盘,那么将systemd配置文件的rclone.service改成rclone1.service即可,重启动什么的同样换成rclone1。
解决Rclone挂载Google Drive时上传失败和内存占用高等问题
方法
首先获取谷歌API凭据,获取方法在之前很多文章都提过,这里就直接复制粘贴了,先启用Google Drive API,启用地址:点击进入。.png)
再创建一个OAuth client ID,创建地址:点击进入。应用类型选择其他(Other),名称自己填,这里博主填的Rclone。.png)
然后使用rclone config命令配置的时候,会有部分提示:
#直接将你获取到的客户端id和密匙输进去即可Google Application Client IdLeave blank normally.Enter a string value. Press Enter for the default ("").client_id> #输入客户端idGoogle Application Client SecretLeave blank normally.Enter a string value. Press Enter for the default ("").client_secret> #输入客户端密匙#直接将你获取到的客户端id和密匙输进去即可
Google Application Client Id
Leave blank normally.
Enter a string value. Press Enter for the default ("").
client_id> #输入客户端id
Google Application Client Secret
Leave blank normally.
Enter a string value. Press Enter for the default ("").
client_secret> #输入客户端密匙#直接将你获取到的客户端id和密匙输进去即可
Google Application Client Id
Leave blank normally.
Enter a string value. Press Enter for the default ("").
client_id> #输入客户端id
Google Application Client Secret
Leave blank normally.
Enter a string value. Press Enter for the default ("").
client_secret> #输入客户端密匙
最后打开配置时的链接授权时候,就会显示我们自己设置的应用名称。
然后挂载命令如下:
#该参数主要是上传用的/usr/bin/rclone mount DriveName:Folder LocalFolder \--umask 0000 \--default-permissions \--allow-non-empty \--allow-other \--transfers 4 \--buffer-size 32M \--low-level-retries 200#如果你还涉及到读取使用,比如使用H5ai等在线播放,就还建议加3个参数,添加格式参考上面--dir-cache-time 12h--vfs-read-chunk-size 32M--vfs-read-chunk-size-limit 1G#该参数主要是上传用的 /usr/bin/rclone mount DriveName:Folder LocalFolder \ --umask 0000 \ --default-permissions \ --allow-non-empty \ --allow-other \ --transfers 4 \ --buffer-size 32M \ --low-level-retries 200 #如果你还涉及到读取使用,比如使用H5ai等在线播放,就还建议加3个参数,添加格式参考上面 --dir-cache-time 12h --vfs-read-chunk-size 32M --vfs-read-chunk-size-limit 1G#该参数主要是上传用的 /usr/bin/rclone mount DriveName:Folder LocalFolder \ --umask 0000 \ --default-permissions \ --allow-non-empty \ --allow-other \ --transfers 4 \ --buffer-size 32M \ --low-level-retries 200 #如果你还涉及到读取使用,比如使用H5ai等在线播放,就还建议加3个参数,添加格式参考上面 --dir-cache-time 12h --vfs-read-chunk-size 32M --vfs-read-chunk-size-limit 1G
主要参数这里大概说下,具体自己根据vps配置进行调整。
--transfers:该参数控制最大同时传输任务数量,如果你cpu性能差,建议调低,但太低可能会影响多个文件同时传输的速度。--buffer-size:该参数为读取每个文件时的内存缓冲区大小,控制rclone上传和挂载的时候的内存占用,调低点可以防止内存占用过高而崩溃,但太低可能会影响部分文件的传输速度。--low-level-retries:该参数为传输文件没速度的时候重试次数,没速度的时候,单个会自动睡眠10ms起,然后再重试,不行,再睡眠更长一段时间,再重试,这样可以稍微加快文件上传进度。--transfers:该参数控制最大同时传输任务数量,如果你cpu性能差,建议调低,但太低可能会影响多个文件同时传输的速度。
--buffer-size:该参数为读取每个文件时的内存缓冲区大小,控制rclone上传和挂载的时候的内存占用,调低点可以防止内存占用过高而崩溃,但太低可能会影响部分文件的传输速度。
--low-level-retries:该参数为传输文件没速度的时候重试次数,没速度的时候,单个会自动睡眠10ms起,然后再重试,不行,再睡眠更长一段时间,再重试,这样可以稍微加快文件上传进度。--transfers:该参数控制最大同时传输任务数量,如果你cpu性能差,建议调低,但太低可能会影响多个文件同时传输的速度。
--buffer-size:该参数为读取每个文件时的内存缓冲区大小,控制rclone上传和挂载的时候的内存占用,调低点可以防止内存占用过高而崩溃,但太低可能会影响部分文件的传输速度。
--low-level-retries:该参数为传输文件没速度的时候重试次数,没速度的时候,单个会自动睡眠10ms起,然后再重试,不行,再睡眠更长一段时间,再重试,这样可以稍微加快文件上传进度。
如果你还不会使用rclone挂载,或者不会设置开机自启的,可以参考该篇文章的部分内容→传送门
最后博主使用了自己的api后,上传测试了700G上限,基本一次也没出过403等一些问题了,内存占用也还不高,不过限制了些参数后,体验肯定会差点。至于Onedrive,博主也测试了下,貌似还没遇到上传问题,可能是使用rclone挂载的人数没gdrive多吧,至于其他问题也可以参考下本文设置。


.png)


- 最新
- 最热
只看作者